Inovus support centre
Hardware setup
MISHUB Setup Manual
Welcome to the step-by-step assembly guide for the MISHUB. Whether you prefer step by step instructions or a video demonstration, this guide will walk you through the assembly process.
Before you begin, take a moment to review the package's contents and acquaint yourself with the included components. The following content has been crafted to provide you with all the insights required to transform individual parts into a functional and invaluable tool for honing your surgical skills.
Step-by-Step guide
Let's start assembling and enhancing your surgical skills, one step at a time.
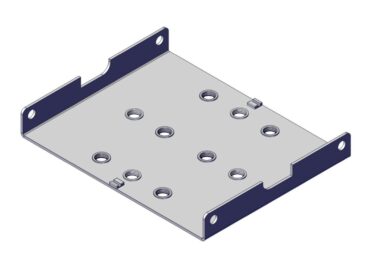
Step 1
Place the MISHUB base plate on a stable, flat surface.
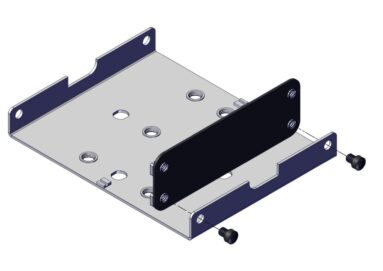
Step 2
Position the front panel against the front edge of the base plate.
Align the holes and secure using the two lock nuts.
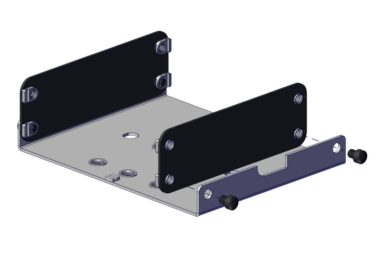
Step 3
Position the rear panel at the back of the base plate.
Ensure the locating tabs are seated correctly.
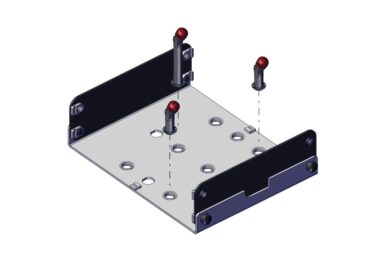
Step 4
Insert the pillars into the designated mounting holes on the base plate.
Ensure each pillar is fully seated and vertical.
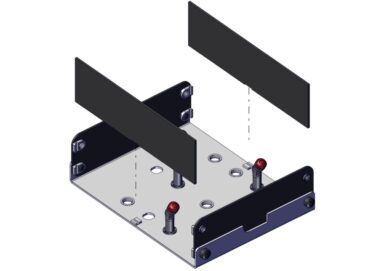
Step 5
Slide the left and right side panels into the locating tabs on the base plate.
Ensure both panels sit flush with the base and front/rear panels.
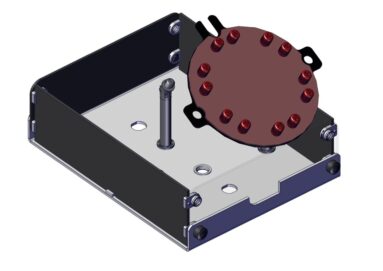
Step 6
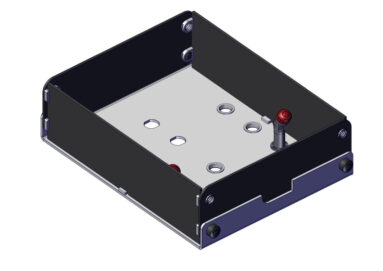
Position the model mounting jig (MMJ) onto the central post.
Ensure it rests securely and is correctly oriented.
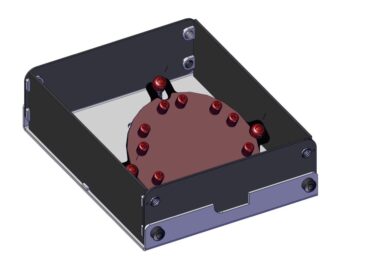
Step 7
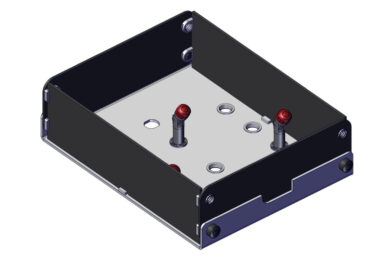
Secure the model mounting jig with the red pillar caps.
Step 8
Alternative model mounting jig configuration
For the alternative configuration, follow steps 8–10 instead of steps 6–7.
Remove the rear tall pillar from the base.
Step 9
Insert the short pillar in the rear slot previously taken up by the tall pillar.
Ensure each pillar is fully seated and vertical.

Step 10
Position the model mounting jig onto the central post and secure it using the red pillar caps.
Ensure the jig rests securely on the three short pillars, with all red caps attached and tightened
With the three shorter pillars in position, the MMJ plate will sit flat inside the trainer.
Step 11
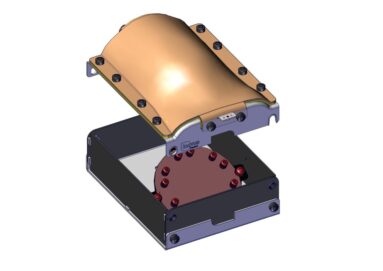
Place the top cover onto the trainer body.
Align the edges and mounting holes with the front and back panels.
Step 12
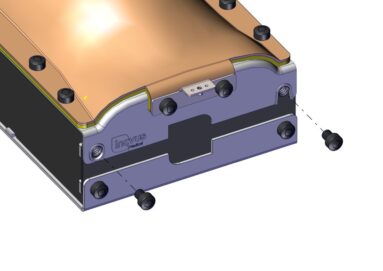
Using the lock nuts included with the kit, insert and tighten the lock nuts on both the front and rear side of the cover.
Do not over-tighten the lock nuts on the right-hand side to allow the lid to open freely.
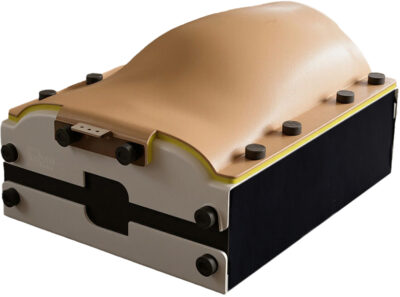
The MISHUB is now ready for use.
Downloads
You can save the MISHUB setup manual below. Or print this page for a hard copy version.
Was this article helpful?
We’re sorry to hear that.
Please can you give us some feedback to improve this page?
If you’d like a member of our support team to get back to you, please send a message to support@inovus.org